

Tuesday, February 14, 2012

Valentine Treats

HAPPY VALENTINE'S DAY!


Hello.....I'm back...told ya I'd be back.  Anyway to celebrate Valentine's Day I thought I'd write this post in red......maybe throw some pink in the mix...who knows.


So what's your plans for today?  Mine....well my dear friend is watching 2 of my boys so my husband and I can go on a mini date.  We are going to see an early movie today before the other gets out of school.  That's about as romantic as is gets in our house.  I wanted to see The Vow, but instead I caved and we are going to see Safe House.  That's ok, cause it's got some eye candy in it......Ryan Reynolds....need I say more!


Anywho, back to the task at hand....VALENTINE'S DAY! Awwweeee......Musssshhhh...Kisssss Kisss.


My middle son is still in preschool so I thought I'd make him some V-Day treats. YUM!


I found the cutiest idea on how to keep your cupcakes from getting smashed here and found super cute V-Day tags here.  All of course I pinned on pinterest so you can follow me too and check them out!


Red Velvet Cake and Cream Cheese frosting


Ahhh Picture is much better!
Added some valentine sprinkles, sorry this picture is so dark
Was gonna use these bags but then realized the cup wouldn't fit.......think, think....what can I do....I made super cute tags how can I stick them on!

Paper hole punch the cup and add some ribbon and your tag....and voila!
I love it! Don't you! I had one left over and man it was tasty!  Hope all the little preschoolers enjoy!
****Candie****

Thursday, February 9, 2012

M. I. A.

Hello....we are still here.....I promise!  It's been super busy with "real life" that we have done absolutely nothing as far as crafting or DIY is concerned.

For me hockey is in full swing, and if I'm not at the rink for practice during the week, I'm there over the weekend for games or traveling out of town for them.  My list of projects is so loooooonnnngg! Paint and redecorate my youngest sons room.  Organize and add shelving to my pantries. Redo not 1 but 2 dining room tables. Find a sitting chair that needs love and redo it. Paint the stairwell and add a gallery wall. Redo the ugly oak shelving unit in my bonus room.  Paint the bonus room and add drapery maybe a craft station, computer table, and built-ins........OMG...I told you the list is so long!

Lindsay.....well she's selling her house so pretty much everything is packed and ready to be moved.  However, they are building their own home so I'm sure you will be seeing some posts from her this year on how the process is going.

Renee......well she is just busy with life in general.....I'm sure she has crafted something wonderful and is too shy to show us.  In fact, I could go thru her entire home and nearly half of her treasures she has crafted herself.....I could have a post nearly everyday for about 4 months with all her DIY crafts.

So please don't give up on us yet! I promise we will be back in the full swing of things shortly!

Thanks for being so loyal and keeping us near!

3krazychics

Thursday, January 5, 2012

DIY Play Kitchen from Old Entertainment Center

Well this is gonna be a different post for us.  I'm going to talk about someone else's DIY project.  It really is simply amazing! A friend of mine wanted her daughter to have a play kitchen.  But as some may know play kitchens really are not that cheap!  So my friend pulled all her crafty-ness together and made her own.

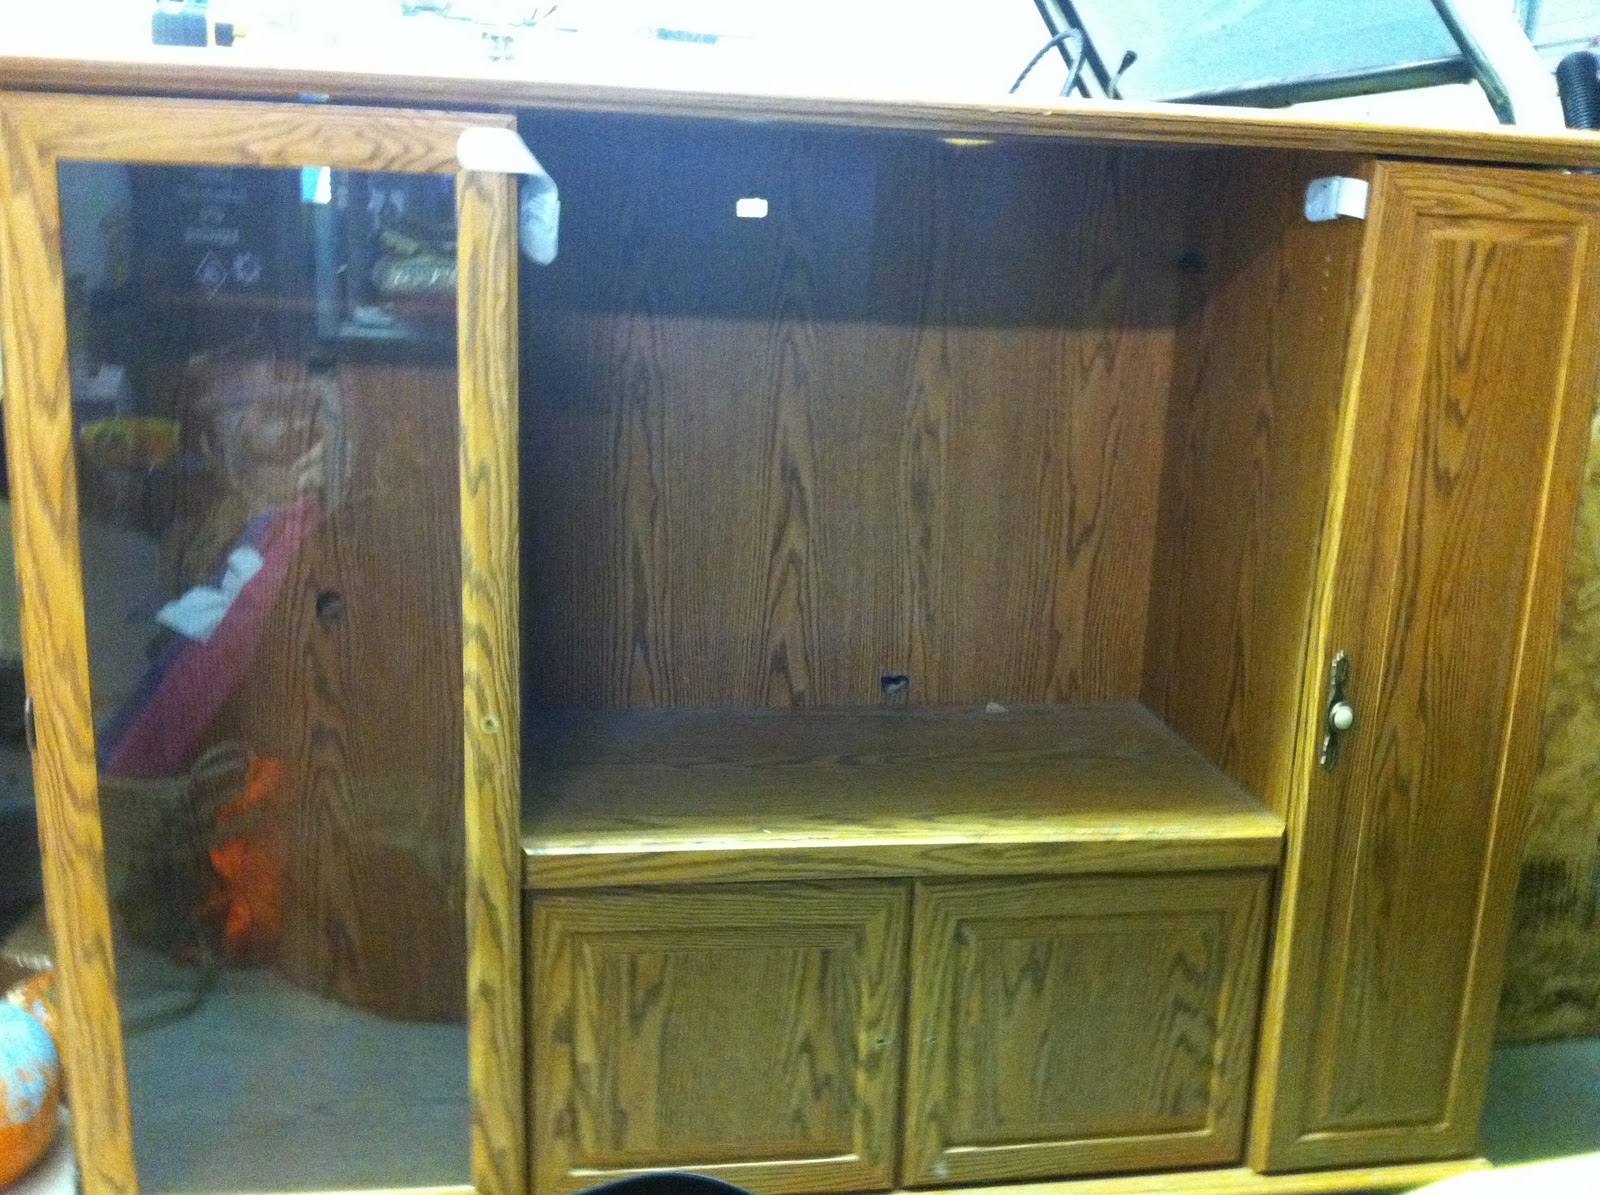
She started with a entertainment center she found on craigslist.....wait for it, wait for it......$15! Yes, I said $15! A. MAZE. ING.

Before:


Then she gutted it out, cut out some holes........


Then got to work, so her daughter would have a play kitchen by Christmas!


The blue wall are contact paper, backsplash is craft paper mod podged on. You see what appears to be a glass top stove, is actually plexy glass spray painted black with paint side glued down. And black CD's used for the burners.  Painted cabinet doors with some hardware. A mixing bowl for the sink and some super sweet hand sewn curtains....not to mention all the little extra finishing touches! Ok, you can't tell this from the picture but the counter top is sprayed with wall texture and painted white! Genius!  
Anyway, don't you just love this! Super sweet and fun! I'm her little girl will have many happy years playing with this one of a kind gem!  Thanks Patricia for sharing all your hard work with us!
**** Candie *****

Friday, December 23, 2011

Baked Christmas Goodies and We Wish You a Very Merry Christmas!

Hey ya'll......I'm back with all the baked goods!  If you read the last post you know I had a mountain of ingrediants and only a few days to bake.  Well I finally finished all the goodies, and from my text messages from the neighbors, they too like their goodies!  YAY! ****Candie****
Here is the list of yummi-ness that I baked up!

1. Rolo Cookies (courtesy of Six Sister Stuff)
2. Peppermint Bark
3. Chocolate Peppermint Cake Pops
4. Peanut Butter Fudge
5. Hershey's Pretzel Bites
6. White and Dark Chocolate Dipped Pretzel Sticks

Look at all that goodi-ness!!!!

Rolo Cookies and Peanut Butter Fudge

Hershey's Pretzel Bites and Drk Choco. Dipped Pretzel Sticks
White Chocolate Dipped Pretzel Sticks and Peppermint Bark

Peppermint Chocolate Cake Pops (these were kinda hard)

Thanks for keeping us going......... We all hope you have a VERY MERRY CHRISTMAS!

******3KRAZYCHICS*****

Tuesday, December 20, 2011

Sneak Peak Christmas Baking

Hello all! Christmas time brings lots of merry cheer and lots and lots of baking!

Well here is a sneak peak of what I will be baking up in the next couple days! I deliver these wonderful goodies to my neighbors.....you know who you are....lucky duckies!


Can you guess what I'm making? Stay tuned at the end of the week and I will reveal all the goodies!
****Candie****

Monday, December 12, 2011

Mini Apple Pies

I made these little ity bity apple pies the other night.  They turned out yummy, however the picture did not do it justice at all!

Used just the basic ingredients for the making of an apple pie.  Depending how much apples you cut up, will depend on how much ingredients you use.  I basically had to eyeball it.  I did cheat and use store bought dough.  Cut little rounds using the pampered chef sandwich sealer that I have. Put them down inside the cupcake pan, cut up little pieces for the top......and bake!

Enjoy! ****Candie****


Tuesday, December 6, 2011

Blogiversary Winner!

Hello Everyone! We have a winner in our Blogiversary giveaway! Thank you to all that participated, we really appreciate it!


The winner can choose between these two pillows:


And the winner is:


Anonymous said...

I Follow via GFC
Connie Haack
letsgosew(at)yahoo(dot)com


Congrats to CONNIE HAACK!
We will contact you via email, and you have 48 hours to respond, otherwise, we will have to choose a new winner.

LinkWithin

Related Posts Plugin for WordPress, Blogger...